
How SoShiny works
Step-by-step guides for every feature. Already a member? Your role-specific help lives inside your dashboard.
Board & management
Association Health report
Association Health (the highlighted Org Health button under Home, which also shows your overall health score) is a report dashboard that answers three questions at a glance: how complete your member profiles are, who you can actually reach, and who has engaged with the portal.
Vitals. The tiles across the top show average profile completion, how many members are fully set up, the share reachable by email, the share opted in to texts, and the share who have ever signed in.
Member profiles. The completion-spread chart buckets every member by their setup-checklist score. "Where members stall" shows each checklist item — done, deliberately skipped (a skip like "I don't have a vehicle" counts as answered), or still open — so you can see which items the community gets stuck on. Below that, the worklist lists every member under 100%, lowest first, with exactly what's still open and a one-click link to their profile.
Reach. The email-reachability ring shows who a broadcast actually lands with — and how many members are letter-only, with a shortcut to Mail Letters or to the directory filter for collecting emails. The text-alerts meter shows how many members have opted in to SMS.
Engagement. Sign-in meters show who has ever signed in and who was active in the last 30 days — and how many members have never signed in at all.
Use the Print button to hand the report out at a board meeting. Payments and financials will join this report as those features roll out.
Why the big numbers count units
The gauges across the top count units, not individual people. A unit counts as covered when at least one of its owners has the thing in question. If a unit has two owners and one of them has an email address on file, that unit is reachable by email.
This is deliberate. When you send a notice, what matters is whether the notice reaches the unit, not whether every co-owner separately has an address on file. Measuring people made well-run associations look far worse than they are.
Under each gauge, in smaller text, is the same figure counted per member. That is the number to work from when you are chasing individuals, and it is what the worklist further down the page is built on.
Owners and co-owners count toward their unit. Tenants do not: a renter having an email address does not make the owner reachable, and owner contact is what statutory notice depends on.
Mail Letters (printed mail)
Send real printed letters by USPS First-Class mail — no printing, stuffing, or stamps. Find it under Operations → Mail Letters. Letters cost a flat per-letter price shown right on the page and are paid from your community's prepaid communications balance (top up with $25 / $50 / $100 via the Add funds buttons).
Who can send: board admins, the property manager, and the board president.
Audiences: all members, owners, one letter per unit (primary owner only — saves postage on co-owned units), renters, board, or members without email — the people you can't reach any other way. You can also send to a single member from their directory profile (the 📮 Letter button).
Before anything mails, the page shows exactly how many letters, the total cost, and your balance afterward — and asks you to confirm. Members without a mailable address are listed by name, never silently skipped. Each mailing keeps a full record: who received it, delivery tracking, and the letter itself under "View the letter that was sent."
Postage choices & delivery details
Pick per mailing: First-Class (about 3–5 business days) or Standard (cheaper, about 1–2 weeks) — the preview reprices live. The "members will be skipped" note links to exactly who and why; if a member's mailing address can't receive US mail, their profile offers a one-click switch to deliver letters to their unit at the community instead.
Vendors — who we hire, and whether they are insured
The Vendors page is the roster of companies the association pays: landscaping, elevator, pool, trash, insurance, utilities, and the rest. Every community gets it. You do not need to use SoShiny accounting.
What is a certificate of insurance?
A certificate of insurance (COI) is a one-page document from the vendor's insurance company. It proves they have coverage — usually general liability, and sometimes workers' compensation. It should name the association as an additional insured. If a worker gets hurt or the vendor damages a unit and they are not insured, the association can end up on the claim.
The checklist
- W-9 on file — needed if you will send them a 1099. Attach the PDF and the box ticks itself when the filename contains W-9.
- Current insurance — attach their certificate, or link it on the Insurance page. The expiry date then maintains itself.
- License number — when the trade requires one (elevator, electrician, plumber).
New vendors start as Pending review. When the checklist is clear, one click marks them Approved.
Public signup and the upload link
Vendors can apply themselves at yourcommunity.com/vendor. That creates a pending vendor. For someone already on the list who is missing a W-9 or a certificate, send them their private upload link from the vendor record. The link works without an account and expires in 30 days, or when you issue a new one.
Importing a list
Use Import CSV on the Vendors page to bring across a QuickBooks Vendor Contact List, or any spreadsheet with a Vendor column and an address or email. You do not need phone numbers or tax IDs first.
Each row is matched to a vendor already on this community's list, in this order: tax ID, email, then a cleaned name (so AWS Roofing and AWS Roofing Services, Inc. are the same company). Address is only a second look when the street number and ZIP agree and the names are close. You review the plan — create, use the existing vendor, or skip — before anything is saved. If it is the same company, empty fields are filled in. A tax ID or email already on file is never overwritten with a blank. Cash, void, Amazon, export timestamps, and people listed at the building address are skipped.
How this differs from Employees, Contacts, and Bills
Employees are people on your roster. Contacts is the public phone list. Bills is what you owe, if you keep the books in SoShiny. Vendors is the companies you hire and the paperwork that proves they are allowed to work here.
Search and missing-info filters
Search the list by company name, email, phone, trade, or city. The Missing chips show who still needs an email, phone, tax ID, W-9, certificate of insurance, or business license. Click a chip again to turn it off. Status tabs and the search box stay in sync with the filter you picked.
Already on the list
The public page at yourcommunity.com/vendor looks up a company by cleaned name, not only by email or tax ID. If they are already on the roster, they claim that record instead of creating a second one. When the row has no email, they can add one and we send the upload link. A new application with the same name is refused.
Download the list
Export CSV on the Vendors page downloads exactly what you are looking at, including a search or a missing-email filter.
The vendor file
Click a vendor name to open their file: contact details, paperwork, documents, work orders, bills, and insurance. Print vendor details from that screen. Deactivate a vendor from Edit, not from the list.
Finances: budget and cash forecast
The Finances page answers one question a board asks constantly: given what we bill and what we plan to spend, where does the bank balance land each month this year?
Getting started in about ten minutes
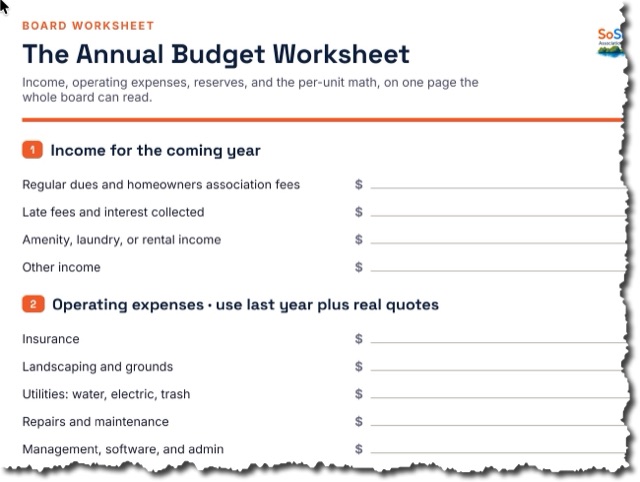
1. Pull in your income. If your units already have annual assessments recorded, click Use my unit roll as income and the page adds them for you. Edit the amount afterwards if you need to.
2. Add what you spend. One line per category: insurance, landscaping, utilities, management, reserve transfers. Enter the amount for the whole year and pick the timing. A monthly cost spreads evenly. An annual insurance premium lands in the month you choose. Quarterly contracts land four times.
3. Type your bank balance. Under Cash on hand, record each account from your statement. Do this once a month and the forecast stays anchored to reality instead of theory.
4. Set your collection rate. If you historically collect 96 percent of what you bill, enter 96. A budget that assumes everyone pays on time is why boards run short late in the year.
Reading the chart
The line is your projected operating cash at the end of each month. The red dot marks your tightest month. If the line crosses below zero the page says so plainly, which is your signal to move a large expense, trim spending, or revisit dues.
Reserves
Mark a spending line as the Reserve fund and name its component, such as Roof or Paving, and reserve transfers stay separate from operating money. Record reserve account balances the same way under Cash on hand.
Who can see and change it
Board admins, property managers, and the board member holding the treasurer or secretary-treasurer office can edit the budget. Other board members see everything but cannot change it. Owners see a summary of the budget and where their assessments go, without vendor detail or anyone else's balances.
What is coming next
This is the first phase. Recording bills and vendor payments, bank reconciliation, and year-end reports your accountant can use are on the way.
Bills, vendors, and bank reconciliation
Bills and Reconcile are how money leaving the association gets recorded and proven.
Recording a bill
Add the vendor first under the Vendors tab, then record the bill: invoice number, date, due date, and one or more lines saying which expense accounts it hits. A roofing invoice might be split between repairs and reserves. The journal entry posts automatically, so what you owe is always current.
Paying a bill
Click Pay on any unpaid bill. Enter the amount, the date, how you paid, and the check number. Partial payments are fine, the bill simply shows as partly paid. Paying more than the bill is for is refused, so a typo cannot quietly corrupt your books.
Vendors and year end
Mark a vendor as needing a 1099 and record their tax ID and whether their W-9 is on file. You can also record when their insurance certificate expires, so an expired vendor is visible before you hand them more work.
Reconciling an account
Once a month, open Reconcile, choose the account, and enter the statement date and ending balance exactly as the bank shows it. Tick each transaction that appears on the statement. The Difference box updates as you go. Anything you leave unticked is treated as still outstanding, like a check nobody has cashed.
When the difference reaches zero, choose Save and close. The system refuses to close a reconciliation that does not balance, which is the entire point of doing one.
Who can do this
Board admins, property managers, and the treasurer can record bills, make payments, and reconcile. Other board members can see everything. Owners do not see bills or vendors.
Financial reports, reserves, and the accountant export
Reports turns everything recorded on Finances, Books, and Bills into the statements a board and an accountant expect.
Statements
The income statement shows what came in and went out this fiscal year. The balance sheet shows where the association stands, and confirms that assets equal liabilities plus fund balances. If those ever stop tying, the page says so.
Budget versus actual
Each budget line is compared against what actually posted. Favourable variance means more income or less spending than planned. Budget lines that are not yet linked to an account are listed separately rather than counted as zero, so nothing hides. Use the matching button to link them by name, or pick accounts by hand.
Reserve schedule
Add each component from your reserve study: replacement cost, useful life, and years of life left. The page pulls the balance for that component out of the ledger and shows how fully funded it is. This is the component-level view Florida expects, and the thing boards struggle to produce from ordinary accounting software.
1099s
Vendors flagged for a 1099 on the Vendors tab appear here with what you have paid them this calendar year and whether they cross the reporting threshold. Missing W-9s are called out.
Florida reporting level
Florida scales the required annual financial report with revenue, from a report of cash receipts up to audited statements. The page shows which level your revenue puts you in. Treat it as a guide for your accountant, not as the report itself, and confirm current thresholds with counsel.
Sending it to your accountant
Five downloads: trial balance, general ledger detail, income statement, balance sheet, and 1099 totals. They open in any spreadsheet program and import into QuickBooks or Xero. If you filled in the external account codes on your chart of accounts, those travel with the export so their numbering matches yours.
Importing your books from QuickBooks or a spreadsheet
Import brings your existing accounting across in a few minutes. You do not need years of transaction history, just a trial balance.
What to export
QuickBooks Online: Reports, search for Trial Balance, set the date, then Export to Excel and save it as CSV.
QuickBooks Desktop: Reports, Accountant & Taxes, Trial Balance, then the Excel button and save as CSV.
Xero: Accounting, Reports, Trial Balance, then Export as CSV.
Use the date your old system was last reconciled. Everything before it stays with your accountant, everything after gets recorded here.
Reviewing the matches
Upload the file and you get a table of every account it found, with the account in your chart it matched. Common naming differences are handled, so Accounts Receivable finds Assessments Receivable and Management Fees finds Management and Payroll. Anything it does not recognise is offered as a new account, with a suggested type you can change. Set anything you do not want to bring across to Skip.
Nothing is saved until you press the button. If a file is wrong, upload a different one.
If the file does not balance
A trial balance should have equal debits and credits. If it does not, the page tells you by how much. Usually a row was cut off during export. You can still import, and the difference becomes your fund balance, but it is worth checking the export first.
Vendors and unpaid bills
Two more tabs bring across your vendor list and any bills you have not paid yet. Import vendors first, since bills are matched to vendors by name. When importing vendors there is an option to replace their names with categories such as Landscaping Vendor, which is useful if these books are going into an account other people will see.
Doing it by hand instead
If your books are simple, skip the import. The Books page has a short form where you type the balances you have today and it works out the rest.
Board & management
PM Schedule (preventive maintenance)
The PM Schedule (Operations → PM Schedule) tracks preventive-maintenance tasks that repeat on a schedule — so recurring upkeep never falls through the cracks.
Creating a task
Click + New PM task, give it a title (e.g. “Replace pool filter cartridges”), optionally a category and location, then choose how often it repeats: daily, weekly, every two weeks, monthly, quarterly, twice a year, yearly, a custom number of days, or one-time. Set the first due date and how many days before due you want the reminder to go out.
Assigning & reminders
Assign each task to an employee or a board member. SoShiny emails the assignee a reminder before the task is due, and an overdue warning if it passes its due date. (Email goes to whoever has an address on file; SMS reminders are coming once text messaging is enabled.)
Completing tasks
When the work is done, type an optional note and click ✓ Done. The task is logged complete and the next occurrence is scheduled automatically based on its frequency. Use the All / Mine / Due soon / Overdue tabs to focus the list. Pause or archive a task anytime from its Edit screen.
Completing a task & the Done list
When you mark a maintenance task Complete, a prompt confirms it’s done and asks whether to schedule the next one — with the next date pre-filled and editable. Uncheck the box to stop the recurrence instead of rescheduling.
The schedule opens on the Next 2 weeks view by default. Use the date range to look at any window, and the ✓ Done tab to see every completed task (what, when, who, and notes).
Tasks & My Work
Tasks (Operations → Tasks) is a shared to-do list for your community team. My Work is your personal inbox that gathers everything assigned to you in one place.
Adding & assigning tasks
Click + New task, give it a title and optional notes, set a due date and priority. Board members and managers can assign a task to any employee or board member; everyone else adds tasks for themselves. When you assign a task to someone, SoShiny emails them so it does not get missed.
Tracking progress
Each task has a status — Open, In progress, Blocked, Done — that you can change right from the list. Use the Mine / Assigned by me / Open / Done tabs to filter. Overdue tasks are flagged in red.
My Work
The My Work page is one prioritized list of everything on your plate: your open tasks, preventive-maintenance items coming due or overdue, and any work orders assigned to you — newest and most urgent first. Click any item to jump to it.
Opening, printing & sharing a task
Click a task title to open its detail view. From there you can Print it, Email it to selected team or board members (with an optional note), or Text it (once SMS is enabled).
Done report
The Done report button lists tasks completed in a range — this week, last week, this month, last 30 days, or a custom range — and you can print it or email it to your board.
Searching & filtering tasks
Use the search box to find a task by its title, notes, or the assignee’s name, and the Assigned to dropdown to narrow the list to one person, a group, or unassigned tasks. Your search stays put as you switch between the Open / Mine / Done tabs.
Work Orders vs. To-Do Tasks vs. PM Schedule
SoShiny has three task-like tools that are deliberately different — think of it as what kind of work:
| To-Do Tasks | Work Orders | PM Schedule | |
|---|---|---|---|
| Purpose | General action items | Physical repairs/jobs on the property | Recurring scheduled maintenance |
| Example | “Get 3 roof bids,” “call insurance” | “Fix the leaking pool pump in Bldg B” | “Replace HVAC filters every month” |
| Tracks | title, assignee, due, priority, status | + location, unit, contractor, cost estimate vs. actual, full timeline of notes | + frequency, auto-recurrence, next-due |
| Driven by | a person’s to-do list | a maintenance ticket (often from a resident concern or ARC) | a calendar/cadence |
| Audience | board, managers, employees | management (contractor-facing) | management/maintenance |
| One-off / recurring | one-off | one-off | repeats automatically |
The simple rule
- Work Order = “something on the property is broken or needs a contractor” → tracks the job, its cost, and which unit/location.
- To-Do Task = “a person needs to do something” → lightweight, no cost/contractor, just an assignable action.
- PM Schedule = “this maintenance repeats on a schedule” → auto-generates the next one when you complete it.
Removing a member who sold or moved out
When an owner or renter sells or moves out, you want to remove them from the unit but keep their history. There are two steps.
1. Deactivate the person (the “keep their history” step)
Directory → open the member → Deactivate. This sets them to inactive: they drop off active rosters and can’t log in, but their record and full history stay intact — nothing is deleted. You can find them later under the Directory’s Deactivated / former members view, and reactivate them if they ever return.
2. Update the unit
Open the Unit → under Occupants, Remove the old owner/renter and Add the new one. That makes the unit show the correct current people.
In short: Deactivate = preserve the person + history; remove-from-unit = fix who’s currently there. Do both.
Vehicle Registry — every car, truck, RV, and golf cart on the property
The Vehicle Registry is a full record of every vehicle parked on or assigned to the property. Members register their own cars from their profile (look for 🚗 My vehicles), and board admins or property managers see and edit the full registry from /dashboard/vehicles.php.
For each vehicle, the registry captures plate + state, year / make / model / color, kind (car, truck, SUV, motorcycle, RV, trailer, golf cart, or other), parking choice (assigned spot, general parking, or off-site), and a board-assigned sticker number with issue date.
For boards: two printable views are one click away — a per-vehicle parking pass (laminate-ready, identifies the car as authorized) and a wrong car in the lot warning notice the board fills in on the fly with the offending plate. A print-ready list of every active vehicle in the association is also available.
For residents: add your own vehicles from your profile so the board knows what belongs and what doesn't. If your car gets a sticker number from the board, it will show up on your record automatically.
Who's Away — travel schedule for snowbird season, hurricane prep, and worker access
Who's Away is a digital housekeeping board for tracking which units are temporarily unoccupied. It's useful for snowbird season, hurricane prep, scheduling worker access, and giving the board an at-a-glance view of who's gone.
For residents: mark your own travel ranges from your profile (look for ✈️ My travel schedule). You can record a quick trip or a long snowbird absence, with optional emergency contact, authorized entry, pet on premises, vehicle left behind, encrypted key location, and notes. Your travel ranges are private to you — other residents don't see them.
If you're a returning snowbird, the system will offer to clone last year's absence forward by one year, so you don't have to retype everything.
For boards and property managers (this view is board-only by design and not configurable to lower roles): visit /dashboard/whos-away.php for the management grid — filter tabs (All / Away now / Scheduled / Home), unit-number search, inline add/edit forms, and unit cards with absence rows. The companion print-ready emergency view at /dashboard/whos-away-emergency.php lists every currently-away unit with all contact details for hurricane prep or building shutoffs. Key locations are intentionally excluded from the print view and must be looked up per-unit (every reveal is audit-logged).
Key locations are encrypted at rest with libsodium and only decrypted on demand.
Notifications log — every email this portal sent on your behalf
The Notifications log is your audit trail for every transactional email SoShiny has sent on behalf of your association — invites, password resets, document-sign requests, broadcast emails, marketplace approvals, board notifications, welcome emails, the works.
What you'll see for each entry:
- Recipient — who got the email, by user record + the actual address it was sent to.
- Subject — the same line they saw in their inbox.
- Kind — what flow triggered it (e.g.
document.sign_request,broadcast.send,welcome.day0). - Status — queued / sent / failed / bounced. If the send provider reported a hard bounce or spam complaint, it's marked here.
- Sent at — when SoShiny handed it to Postmark for delivery (not necessarily when the recipient opened it).
- Sent by — the board member or system component that triggered the send.
Why this matters:
- Someone says "I never got the document-sign email" — search the log by their name to see whether it actually went out and whether it bounced.
- Someone forwards you a phishing email that claims to be from your association — you can check the log to confirm whether SoShiny actually sent it.
- Board changes: see what notifications the previous admin triggered before they stepped down.
- If you ever suspect the platform isn't sending an email, you'll see the failure here with the error message from the provider.
The log only captures email SoShiny sent through its own pipeline. Outbound calls from your personal Gmail to a board member don't appear here (and shouldn't).
Curated digest — one rollup email instead of ten one-offs
Digest lets you send a single rollup email summarizing recent community activity. Use it to keep the board (daily) or all owners (weekly) caught up without flooding inboxes with separate notifications for every announcement, event, document, or meeting note.
How it works:
- Pick a cohort — Board (just admins/PMs/members), Owners, or All Members.
- SoShiny shows you candidate items pulled from the last 14 days: announcements, upcoming events, new documents, recent meeting minutes, new marketplace listings, plus board-only items like concerns, ARC requests, pending amenity bookings, open work orders, and recent violations.
- Tick the items to include and add an optional intro note ("Quick check-in for the board…").
- Send. Recipients receive a branded HTML email grouped by category.
The "sent once per recipient" guarantee:
- For each recipient, SoShiny filters out items they've already received in any prior digest. So a member who got Tuesday's digest will not see Tuesday's items repeated in Friday's digest, even if you check the same boxes.
- If all the items you picked have already been delivered to a particular recipient, they're auto-skipped (no empty email).
- The compose page shows the recipient count up front and the result page reports sent vs skipped.
Cadence is fully manual — no cron, no schedule. The board decides when to fire. Most communities settle into a rhythm: daily roll-up to the board, weekly to owners.
Every digest send also lands in the Notifications log as digest.sent records, one per recipient, so you have an audit trail of who got which roll-up.
Billing & subscription
Manage your community's SoShiny plan from Settings → Subscription → Billing & subscription.
Starting your subscription
Every association begins with a 30-day free trial — no credit card required up front. Click Start free trial to set it up. Before the trial ends, add a payment method to keep your community running.
Pricing
During the America 250 special you pay $25/month base + $0.33 per unit (normally $50 + $0.50) — and that rate is locked for the life of your account when you start before December 31, 2026. Every feature is included; there are no tiers.
Payment methods
We accept credit/debit card and bank account (ACH). Payments are processed securely by Stripe — SoShiny never sees your full card or bank details. Use Manage billing to update your payment method, download invoices, or cancel anytime.
How units are billed
Your per-unit charge follows the number of units in your directory. As you add units during setup, your billing trues up automatically before your next invoice — there are no surprise mid-cycle charges.
If a payment fails
Stripe automatically retries a failed payment over about two weeks and emails you to update your card. Your community keeps working during that window; access is only paused if every retry fails.
Board meetings — agenda, minutes, and resolutions
The Board Meetings page manages the full lifecycle of a meeting — building the agenda, recording attendance, capturing resolution votes with per-member tallies, and producing print-ready minutes in the format required by Florida statute.
Creating a meeting
Click + New meeting and fill in the date, time, location, and meeting type (Regular, Special, Annual, Emergency). The system automatically adds an "Approve minutes from the last meeting" item to every new agenda. Add additional agenda items on the meeting detail page.
Agenda items
Each item has a type (Discussion, Resolution, Vote, Report, Old Business, New Business, etc.), a description, and optional fields for the motion text and BE IT RESOLVED clause. Items are displayed in sort order — adjust the sort number to reorder them. During or after the meeting, set each item to Approved, Denied, Tabled, or No Action.
Resolutions and per-member votes
Resolution-type items show a vote grid with one row per board member. Votes can be Yes, No, Abstain, Not Present, or N/A. Only board members and managers appear in the vote grid — residents do not. Vote counts tally automatically and appear in the minutes. Add the full resolution language in the BE IT RESOLVED field.
Print-ready minutes
Click Print minutes on any meeting to produce a clean, formatted document with the meeting header, all agenda items in order, resolution votes with counts, and a signature block. Formatted to Florida §718.112 board meeting standards and ready to sign.
Minutes archive
All meetings stay on record. The Minutes page in the Resources section gives members read-only access to past meetings according to the permission you set in Settings → Permissions → Read meeting minutes.
Joining virtually (Zoom, Google Meet, Teams)
Paste the join link into the Meeting link box right on the Agenda tab — SoShiny detects the platform automatically and builds a short public link (yourassociation.com/meeting/123) that anyone can open to see the meeting time, location, and a Join button. Share that short link by text, email, or calendar invite instead of the long Zoom URL. Need a meeting ID, passcode, or dial-in numbers for the printed notice too? Click "More options" under the link field to add them on the fuller form.
The short link never shows an executive session, and never shows a meeting whose notice hasn't been posted yet — it only opens once the meeting is public.
Emailing the agenda
Click Send agenda next to Print agenda to email the meeting straight to the Board or to Owners. You can add an optional note that appears near the top of the email, choose who receives it, and preview exactly what will be sent before it goes out. Only agenda items marked Approved are included. The email links back into the portal instead of pasting the whole agenda into the message.
Board voting — ballots and results
The Voting page handles formal ballot-style votes separate from board meeting resolutions — budget approvals, bylaw amendments, board elections, or any issue that needs a recorded community vote.
Creating a ballot
Click + New ballot and fill in the title, description, deadline, and eligible voter group (all members, owners only, or board only). Add the question and the choices voters will select from.
Casting a vote
Members who are eligible see open ballots on the Voting page and click to cast their choice before the deadline. Each eligible member can vote once. Once cast, a vote cannot be changed.
Anonymous by default
Votes are anonymous by default — only participation counts are tracked during the open window, not who voted what. Individual choices are not stored against user accounts.
Results reveal
Board admins control when results are revealed. Before the reveal, only participation count is visible ("X of Y eligible members have voted"). After the board reveals results, vote totals and percentages appear for everyone eligible.
Closing a ballot
After the deadline passes, no new votes are accepted automatically. The board can also close a ballot manually before the deadline. Closed ballots stay on record with final totals.
Email broadcasts
Email Broadcasts let the board send a formatted email directly to members inboxes — meeting notices, maintenance alerts, newsletters, emergency notifications, or any communication that needs to reach everyone at once.
Composing a broadcast
Go to Email Broadcasts in the sidebar and click + New broadcast. Write a subject line and body, choose your audience (all members or a custom selection), optionally attach a PDF, and click Send.
Email costs $0.02 per recipient
Sending draws from your prepaid communications balance — the same balance used for text messages and letters. You can draft and save a broadcast at any time for free; only clicking Send charges the balance. If your balance is short, nothing goes out and your message is saved as a draft instead of lost — top up from the banner on the compose page or the Communication fees page. Password resets, sign-in links, and other automated system mail are never charged.
Your email pool is capped by units
An association can hold up to 5 email addresses per unit on file (100 units → 500 emails). Add units under Units before importing or adding a large list of people — the directory header shows your current usage (e.g. "Emails 120 / 500").
Audience selection
By default the broadcast goes to all active members with a real email address on file. Use the Custom member selection option to open a member picker and select specific individuals — useful for committee-only notices, floor-specific alerts, or targeted unit owner communications.
PDF attachments
Attach one PDF per broadcast — meeting agendas, budget summaries, formal notices, or any document you want to accompany the email. The PDF is included as an email attachment for every recipient.
Delivery tracking
After sending, the broadcast detail page shows per-recipient delivery status — Sent, Delivered, or Failed. Members with placeholder email addresses (addresses that are not real inboxes) are automatically excluded from the send count and recipient list.
Who can send
Board members and above can send broadcasts by default. The board admin can adjust this in Settings → Permissions → Send email broadcasts.
Activity log
Every broadcast is recorded in the Activity log with sender, subject, recipient count, and timestamp. This provides an audit trail for all community communications.
Document signing and e-signatures
SoShiny includes a built-in e-signature workflow for PDF documents — lease addenda, estoppel certificates, policy acknowledgments, and similar documents that require a resident signature on record.
Requiring signatures on a document
On the Documents page, open a PDF and use the Required signers tag field to select which members must sign. Start typing a name and select from the autocomplete list. You can add multiple required signers. Click Notify to send each pending signer an email with a direct link to sign.
Signing a document
When you receive the signing notification (or open the document yourself), you see a preview of the PDF. Drag and resize the signature placement box to position where your signature will appear on the document. Click Sign and save. Your saved signature image is used automatically — you do not need to redraw it each time. Manage your saved signatures from your Profile page.
Signed copies
After signing, a signed copy of the PDF is generated and stored against your signer record. You can download your signed copy from the document page. Board admins can see all signed copies for all signers.
Audit certificate
Every signed document has a dedicated audit certificate page showing: who signed, the timestamp of each signature, the IP address at signing, the document hash before and after signing, and the legal disclosure text each signer accepted. This meets the core requirements of the federal E-SIGN Act and Florida UETA.
Signature badge
Documents with required signers show a signature status badge in the Documents list — how many have signed out of how many are required, and whether you specifically still need to sign.
Legal note
E-signatures are legally binding for most HOA documents under E-SIGN/UETA. However, some specific notice types — foreclosure proceedings, fine hearing notices — may still require physical paper service under Florida statute. Confirm with your HOA attorney for anything consequential before relying on e-signatures exclusively.
Signing documents you compose in-app
You can collect signatures on a document you write right here — not just uploaded PDFs. When you Compose a document, use the Request signatures field to add the people who must sign (leave it empty if no signature is needed).
- Each required signer sees a “You have a document to read & sign” prompt at the top of their dashboard.
- They open it and sign with a saved signature, by drawing, or by typing their name.
- The signatures appear in a signature block at the bottom of the document, with date and audit details.
- From the document page you can Notify a pending signer by email or remove them. Once everyone signs, all signers are emailed the completed document.
Lobby TV — setup, PIN, layouts, and themes
The Lobby TV is a full-screen display designed for lobby kiosks, monitors, or any TV with a browser. It shows announcements, upcoming events, and marketplace listings in real time without requiring a signed-in user account.
Accessing the TV display
Navigate to /tv in any browser. Enter your community slug (e.g., bellair) and the 4–10 digit PIN set by the board admin. After a successful login you will receive a bookmarkable URL — set this as the home page on the lobby browser. The URL never expires unless you change the PIN.
Managing the PIN
Go to Settings → Lobby TV. The current PIN is shown. Click Change PIN to set a new 4–10 digit numeric PIN. Changing the PIN invalidates all previously bookmarked TV URLs immediately — every TV screen will need to log in again with the new PIN.
Layouts
- 3-column — Announcements, Events, and Marketplace displayed side by side. Each column scrolls independently. Best for wide-format landscape screens.
- Ticker — All content (announcements, events, marketplace) merges into a single horizontal scrolling feed of large cards, sorted by date. Best for narrow displays or when you want one unified stream.
Themes
- Dark — navy background, white text. Default. Best for dim lobbies where dark screens pop.
- Light — white background, dark text. Better in brightly-lit lobbies where dark screens wash out.
URL parameter overrides
You can override layout and theme in the bookmarkable URL without changing Settings. Append:
&style=columnsor&style=ticker&dark=1or&dark=0
Example: ?slug=bellair&pin=2727&style=ticker&dark=0
Useful if you have multiple screens in the same community with different layout preferences.
What the TV shows
- Announcements — active, non-expired posts with audience set to All or Members
- Events — upcoming events in the next 30 days; recurring series expanded to individual dates
- Marketplace — active listings with photos when available
The page auto-refreshes every 10 minutes to pick up new content without manual intervention.
Weather widget
The TV header shows current conditions (temperature in °F and a description) using the free Open-Meteo weather API. It uses your association latitude and longitude from Settings. If those coordinates are not set, the weather widget will not appear.
Rate limiting on login
After 10 wrong PIN attempts from the same IP address, that IP is locked out for 15 minutes. This prevents brute-force PIN guessing.
Display modes
Choose how the board looks under Settings → Lobby TV → Display Mode:
- 3-Column Board — Announcements, Events, and Marketplace side by side, each scrolling.
- Horizontal Ticker — all items scroll across as large cards; good for portrait screens.
- Slideshow — one full-screen item at a time (big image with title and details) that auto-advances every 7 seconds. Best for a single eye-catching display.
You can also pick a layout on the soshiny.com/tv sign-in screen, or add ?style=columns, ?style=ticker, or ?style=slideshow to the TV URL.
Setting a TV PIN
In the Lobby TV settings, set a 4–10 digit PIN, then on the TV go to soshiny.com/tv and enter your Community ID and PIN. Bookmark the page and the TV just reloads that bookmark.
New on the TV
The rotation now includes a 5-day forecast for your city, today's tide times (coastal communities), sunrise & sunset with the UV index, Trivia of the Hour, This Day in History, hourly Dad Jokes and Quotes to Make You Think, and automatic red weather-alert cards whenever the National Weather Service issues one for your area. Owners can watch from home via the Lobby TV link in their sidebar.
Photo slideshow
A group of photos the board uploads on Settings → Photo slideshow. They play in order, full screen, on every lobby TV. When the last photo finishes, the usual events and announcements come back. After a pause you set, the photos play again. Loop forever, until you turn it off or take the photos out.
Pick how many seconds each photo stays up (8 is a good start) and how long events stay on between runs (90 seconds is a good start). Landscape photos fill a TV best. Captions are optional. The TVs pick this up on their next auto-refresh, within about 10 minutes.
Configuring access — who can see what
Board admins can configure exactly which role is required to access each feature in the portal. Go to Settings → Permissions (board admin access only).
How role tiers work
Each configurable feature has a minimum role. Anyone at or above that role can access the feature. Roles in order from least to most access:
- Renter
- Staff
- Owner
- Property manager
- Board member
- Board admin
- Super admin
Setting a permission to "Board member" means board members, board admins, and super admins can all access it — but renters, staff, owners, and property managers cannot.
What is configurable
- Full resident directory (contact details visible to members)
- Contacts page
- Meeting minutes (read-only)
- Work orders (read-only view)
- Violations (read-only view)
- Employee roster
- Insurance records
- Submitting concerns
- Submitting ARC requests
- Managing area attractions
- Posting property listings
What is not configurable
Management write actions — creating work orders, issuing violation notices, editing employees, uploading documents — are always restricted to board and management roles. A misconfiguration cannot accidentally expose those to residents.
Defaults
If you have not changed a permission, it uses the system default. Permissions that have been customized are labeled so you always know what your association has changed vs. what is default.
Member features (added July 2026). Below the role matrix you'll find simple on/off switches for resident-facing features: amenity booking, marketplace posting, survey responses, form submissions, vehicle registration, travel/away reporting, and law-library access. Switching one to Management only hides it from residents and staff — property managers and the board always keep access.
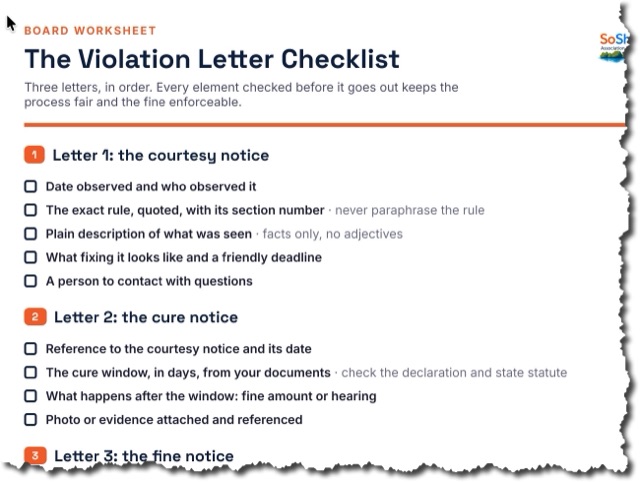
Violation workflow — notices, fines, and tracking
The Violations page lets the board formally record rule violations, issue notices, track progress, and maintain a complete audit trail from first observation to resolution.
Recording a violation
Click + New violation. Fill in:
- Unit number where the violation occurred
- The resident involved, if known
- The specific community rule being violated (searchable from your rules list)
- A detailed description of what was observed, with dates
Save it and the violation is on record with a timestamp and the recording officer.
Notice types
From the violation detail page, issue one of four notice types:
- Warning — first contact, informational, no fine yet
- Cure notice — requires the violation to be resolved by a specific deadline
- Fine notice — formal notice of a fine amount and due date
- Hearing notice — summons the resident to appear at a board hearing
Each notice pre-populates a letter template. You can edit the letter before saving. Every saved notice is timestamped and appears in a timeline on the violation record.
Print-ready letters
Click Print on any notice to produce a print-ready letter with your association letterhead, the rule citation, applicable deadlines, fine amounts, and a signature block. Format is suitable for mailing.
Status tracking
Violations move through statuses: Open, In Progress, Hearing Scheduled, Resolved, Closed. Update the status as the situation progresses. Each status change is logged in the timeline.
Converting from concerns
A resident concern submitted through the Feedback page can be converted to a violation with one click. The violation form pre-fills from the concern text, preserving the original report.
Resident view
The board controls whether residents can see violations in Settings → Permissions → View violations. If enabled, residents see a read-only view of violations (they cannot see internal notes). By default, violations are board-only.
Florida law note
Florida Chapters 718 and 720 have specific service requirements for violation notices — especially for anything that could lead to a fine or hearing. Certified mail with return receipt is the safe default for anything fineable. Confirm your process with your HOA attorney before relying solely on in-app letters.
New: rich notices, signatures, email & evidence
- Rich-text notice body — format the notice (bold, headings, lists); what you see is exactly what prints.
- Choose the signer — pick which board member or manager signs each notice and apply their saved digital signature (or leave a blank line to sign by hand).
- Edit & escalate — edit a notice after issuing it, and use "Issue another notice for this matter" to escalate (warning → cure → fine → hearing) on the same violation.
- Email to owner — send any issued notice to the owner of record (the named resident plus the unit's owners) as a branded email; it shows an "Emailed" badge. Issuing or saving a notice never sends — only the Email button does. Printing is separate too.
- Evidence & attachments — attach photos, screenshots, and PDFs to a violation and keep them with the case as you work it.
- File a violation from a unit — the unit page has a "File a violation" button that prefills the form with the unit and its owner.
Finding, sorting & archiving violations
Use the search box to find a violation by unit number, resident name, or type, and the sort dropdown (newest, oldest, by unit, by status) to order the list. The status pills still filter by state (Open, Notice issued, Cured, etc.).
When a matter is finished and you want it off the list, open it and click 🗄 Archive. Archived violations drop out of every status view (including “All”) but are never deleted — click the Archived filter to see them, and Restore to bring one back.
On a violation’s page the Update status control sits at the top for quick access.
Work orders — maintenance and repair tracking
Work orders are internal tickets for maintenance and repair tasks. Board admins and property managers create and manage them. Residents can be granted read-only access via the Permissions page.
Creating a work order
Click + New work order on the Work Orders page. Fill in:
- Title — a short description of the task
- Description — full details, including what failed, who reported it, and any access instructions
- Priority — Low, Normal, High, or Urgent
- Location — building area or common space
- Unit — if the issue is unit-specific
- Assignee — any active employee, board member, or management contact
Status tracking
Work orders move through: Open → In Progress → Blocked → Completed → Closed. Each status change is logged in a timeline on the work order. You can add free-text notes at any status change — useful for recording what the contractor said, parts ordered, or estimated completion.
Posting a status announcement
When updating a work order status, an optional "Post an announcement" section appears. Tick the checkbox to publish a community announcement at the same time. This lets you close the work order and notify residents in a single action — no need to write a separate announcement.
Converting from concerns or ARC requests
A resident concern or an approved ARC request can be converted to a work order with one click. The work order form pre-fills from the source record, keeping the paper trail connected.
Resident view
The board can enable resident read-only access to work orders in Settings → Permissions → View work orders. Residents see status and description but not internal assignee notes.
Contractor list
The contractor dropdown starts with preferred contractors from Contacts, then lists every vendor on the association roster. Pick from either group. Assigning a vendor does not add them to Contacts.
Print and Ok to Pay
Open a work order and use Print for a letterhead copy — details, notes, and the Ok to Pay block if it is signed.
Ok to Pay is the board authorization to pay the vendor. A manager signs with a saved, typed, or drawn signature and the amount. The signed copy prints with the work order.
Managing members — adding, editing, and inviting
The Directory gives board admins full control over the member roster — adding new members, editing details, inviting members to activate their accounts, sending password resets, assigning roles, and deactivating accounts.
Adding a member
Click + Add member from the Directory page. Fill in name, email, role, and unit assignment. The member is created with no password — they activate their account via an invitation email.
Importing members from CSV
Use the Import CSV button to bulk-import a list of members. The CSV must have columns: first_name, last_name, email, unit_number, role. Members without a real email address can be imported with a placeholder email — they will not receive an invitation but will be in the system for record-keeping.
Your email pool is capped by units on file
An association can hold up to 5 real email addresses per unit — add units under Units before adding or importing a large list of people. With 0 units, only the original board admin login has an email; every screen that adds people shows your current usage (e.g. "Emails 120 / 500 — 100 units × 5") and a link to add units when you are at the limit. Members with no email on file never count against the cap.
Sending an invitation
From a member edit page, click Send invite email to send a welcome email with a secure one-time link. The member clicks the link, sets their password, and their account is activated. Invitation links expire after 72 hours.
Sending a password reset
From a member edit page, click Send password reset to send the member a 1-hour reset link — the same link generated by the Forgot password flow, but triggered by the board admin. Useful when a member is locked out and cannot receive the automated email for some reason.
Editing member details
Board admins can edit any member name, email, role, unit assignment, phone, and status. Use the Edit button on any directory row to open the edit form.
Roles
- Renter — limited access; cannot file ARC requests or see owner-only content
- Staff — building staff; slightly more access than renter
- Owner — full resident access; can file ARC requests and see owner-only content
- Property manager — management-level read access to operational data
- Board member — full board access except admin-only settings
- Board admin — full board access including permissions and settings changes
Deactivating an account
Set a member status to Inactive to disable their login. The member cannot sign in but their data is preserved. This is the correct approach when a resident moves out — do not delete accounts, deactivate them. Inactive accounts are hidden from the directory by default.
Board notes
Board admins can add internal notes to any member record — visible only to board and management. Useful for recording context, move-out dates, outstanding issues, or special arrangements.
Last login tracking
The Directory table shows the last login timestamp for each member. Use this to identify members who have never logged in (shown as "Never") and may need a reminder invitation.
Units — managing unit records
First time loading units or members? Use Load your roster — units and owners together, then renters. Preview, commit, undo.
The Units page is a registry of every residential unit in your community — unit number, floor, type, residents assigned, and any unit-specific documents or board notes.
Unit records
Each unit has: unit number, floor, unit type (Studio, 1BR, 2BR, etc.), and a list of residents currently assigned to it. Multiple residents can be assigned to one unit (owner + renter, for example).
Assigning residents to units
Residents are assigned to units when their account is created or edited in the Directory. You can also reassign a resident from the unit detail page — open the unit, then use the resident assignment section to add or remove members.
Unit documents
Board admins can attach documents to a specific unit — floor plan, lease agreement, inspection report, etc. These documents are visible to residents of that unit plus the board, using the Unit Only access level. Useful for keeping unit-specific paperwork organized without making it visible to all members.
Board notes on units
Board admins can add internal notes to any unit record — renovation history, outstanding issues, special access arrangements, pet registrations not yet in the Forms system. Notes are visible to board and management only.
Parking
Parking spots can be linked to units from the Parking page. See the Parking help topic for details.
Renters, missing contact info & leases
On the Units list, the 🏠 Renters only filter shows just the units that have a tenant, and rows flag “✉ no email” / “☎ no phone” when a unit’s owners have no contact info on file (so you can see which units you can’t reach).
Open a unit and use the Lease section (in Occupants — it auto-opens when a tenant is attached) to record the lease term and rent, and to log renewal decisions (approved or denied, with notes). The Units list flags leases that are expiring within 60 days or already expired.
Registered Guests
The Registered Guests page (Operations → Registered Guests) gives the board and managers one place to see every guest a resident has registered through the guest-registration form.
What you see
- Guest — name and party size
- Unit the guest is visiting
- Visit dates — when the guest arrives and leaves (if provided)
- Vehicle — color, make, and plate for parking
- Registered by — the resident who filed the registration
- Status — Here now, Upcoming, or Past
Tips
- Use the Current & upcoming tab for who’s here or arriving; switch to Past or All for history.
- Search by guest name or unit number.
- Tap any row to open the full registration card (and print a parking permit if needed).
- Residents register guests from Forms → Register a guest.
Board notifications & the daily summary
Instead of one email per event, SoShiny can roll community activity into a single daily summary for the board. Choose how your community is notified under Settings → Board notifications.
The three modes
- Everyone, immediately — the board and the property manager each get an email as soon as something happens.
- Manager now, board daily summary (default) — the property manager gets operational items right away; the board gets one end-of-day summary.
- Daily summary only — everyone gets just the once-a-day summary.
What the summary includes
- Needs the board’s attention — new join requests, amenity bookings, property listings, feedback, forms, and architectural requests.
- Maintenance — how many preventive-maintenance tasks are past due and what was completed that day.
- Leases up for review — rental leases nearing their end date (reminders at 60, 30, 14, 7, and 1 days out, and on the day).
- New in the community — announcements, events, and items for sale posted that day.
The summary is sent around 5 pm in your community’s local time zone, and only on days there’s something to report.
Employees — building staff and vendor roster
The Employees page is a roster of building staff and regular vendors — superintendents, maintenance technicians, doormen, cleaning crews, and anyone else who works in or for the building.
Adding an employee
Click + Add employee and fill in name, title, department, employment type (Full-time, Part-time, Contract, Seasonal), contact information, start date, and notes. Financial details like pay rate and salary are restricted to board admin and super admin view.
Assigning to work orders
Active employees appear in the Assignee dropdown when creating or editing a Work Order. This keeps work order assignments connected to real people in your roster.
Employee documents
Board admins can attach documents to an employee record — W-9, contract, certification, ID. These documents are board-only and quota-tracked against your storage allowance.
Access control
The board can control who can see the employee roster in Settings → Permissions → View employee roster. By default the roster is board and management only. Financial details are always board admin and above, regardless of permissions setting.
Insurance and certificates of insurance (COIs)
The Insurance page tracks the community insurance policies and certificates of insurance (COIs) for vendors and contractors who work in the building.
Community policies
Add your community master policy, directors and officers (D&O) coverage, flood policy, umbrella policy, and any other community-level insurance. Each record tracks: carrier, policy number, effective date, expiration date, coverage amount, and attached certificate PDF.
Vendor COIs
When a contractor or vendor does work in the building, they must provide a COI naming your association as an additional insured. Track those COIs here with the vendor name, expiration date, and the attached PDF. Set an expiry reminder so you know before a COI lapses.
Expiry tracking
The Insurance page highlights policies and COIs that are expiring soon or already expired. Review this regularly — an expired COI means your association may be liable if the contractor causes damage.
Access control
The board can control who sees the Insurance page in Settings → Permissions → View insurance records. By default it is board and management only.
Committees
The Committees page lets the board create and manage standing or ad hoc committees — Landscape, Social, Welcome, Budget, Rules Review, and so on.
Creating a committee
Click + New committee and give it a name, description, and optional chair assignment. Committees can be marked active or inactive.
Adding members
Add any signed-in community member to a committee. Renters cannot be added to committees per the access rules — only owners and above can participate. Each committee member can be designated as Chair or Member.
Committee interest forms
Residents can express interest in joining a committee by submitting a Committee Interest form from the Forms page. Board admins review the submissions and add members manually.
Visibility
Committee rosters are visible to all signed-in members by default. The board can discuss committee business using the document system (Board Only access level) or meeting minutes.
Parking management
The Parking page tracks assigned parking spots, visitor spaces, and the residents or vehicles using them.
Parking spots
Add each parking spot with its identifier (number, letter, or combined label), type (Assigned, Visitor, Handicap, Reserved), and any notes. Link the spot to a unit to track which unit holds the assignment.
Vehicle tracking
Record the vehicles associated with each resident — make, model, year, color, and license plate. This makes it easy to identify unauthorized vehicles or verify a resident complaint about a specific car.
Temporary parking passes
Residents can request a temporary parking pass via the Forms page (Temporary parking pass form). Board admins receive the request and can issue or deny it. Issued passes show in the parking system with an expiry date.
Parking violations
If a parking violation is observed, you can file it as a Violation from the Violations page with the vehicle details and parking rule citation. The violation workflow handles the notice and tracking from there.
Activity log — who did what and when
The Activity log is a full audit trail of every meaningful action taken in the portal — who created, edited, or deleted what, and when. It is append-only: nothing is ever removed from the log.
What is logged
Every significant action is recorded: member logins, document uploads, announcement posts, violation notices issued, work orders created or updated, broadcast emails sent, settings changes, permission changes, member invitations sent, signature events, and more. Minor read-only views are not logged to keep the log useful.
Filtering
Use the date range pickers and the action type dropdown to filter the log to a specific window or event type. Search by member name to see all actions by or about a specific person.
Access
The Activity log is visible to board members and above in the dashboard (Activity in the Configuration group). Super admins see a platform-wide log at /admin/activity.php covering all associations.
Common use cases
- "Who deleted that document?" — filter by document.deleted
- "When was the last violation notice sent?" — filter by violation.notice.issued
- "Has the broadcast email been sent yet?" — filter by broadcast.sent
- "Who changed the permission settings?" — filter by permission.updated
Association settings — profile, plan, and configuration
The Settings page is where the board configures association-wide details — profile, address, geocoding, public landing content, lobby TV, and permissions. Board admin access is required for most sections.
Association profile
Set the association name, slug (used in the public landing URL), address, phone, email, and description. The Photon geocoder runs automatically on save to set the latitude and longitude — these coordinates power the weather widget on the Lobby TV and the map embed on the public landing page.
Public landing sections
The public community landing page at /{slug}/ is built from content you maintain in Settings: about text (Quill editor), amenity list, community photos (from the Media gallery), meet-your-board members (opt-in per user), FAQ, announcements (public ones), events (public ones), and a Plan a Visit section (directions, parking, hours, notes).
Lobby TV
Set or change the TV PIN, choose the default layout (3-column or ticker), choose the default theme (dark or light), and view the bookmarkable TV URL. See the Lobby TV help topic for full details.
Permissions
Configure which role can access each configurable feature. See the Permissions help topic for the full list of what is configurable.
Your account (personal settings)
The Settings page also has a personal section for changing your own password and managing your directory privacy toggle. These settings apply to your account only, not the association.
Plan and storage
Your current plan tier and storage usage are shown in Settings. Storage usage breaks down by category (documents, media, avatars, branding). If you are near your quota, delete old files or contact us about upgrading.
Inviting members and managing account activation
New members are added to the system by board admins, then activated via an invitation email that lets them set their own password.
The invitation flow
- Board admin adds the member in the Directory (name, email, role, unit).
- From the member edit page, click Send invite email.
- The member receives a welcome email with a secure one-time link. The link is valid for 72 hours.
- The member clicks the link, sets their password, and their account is active.
What the invitation email contains
The invitation email includes a personalized greeting, a summary of what SoShiny offers, and a clear call-to-action button linking to the account setup page. It is sent from your association email and signed with the board admin name.
Resending an invitation
If the member missed the email or the 72-hour window expired, open the member edit page and click Send invite email again. A new token is generated and the old one is invalidated.
Members who never activate
The Directory last-login column shows "Never" for members who have not logged in. Use this to identify who needs a follow-up invite. You can also bulk-see this in the directory stats panel (board admin only).
Sending a password reset instead
If a member has previously activated their account but is locked out, use Send password reset from the member edit page instead of a new invitation. The reset link expires in 1 hour and uses the same reset flow as Forgot password.
Members without real email addresses
If you import a member without a real email (using a placeholder like "noemail@example.com"), you cannot send them an invitation. These members can only access the system if you manually set their password and give it to them — there is currently no in-app mechanism for offline credential distribution.
Locations — named spaces used everywhere a place matters
Locations are named places inside your community — lobby, pool, clubhouse, mail room, parking lot, dog park, gym, garbage chute room, anywhere a service or event references a specific spot.
Why they matter
Locations are referenced by:
- Work orders — "fix the light by the south stairwell" reads better as a structured field than free text.
- Amenity bookings — every bookable amenity is a location.
- Events — pick a location instead of typing "the clubhouse" every time.
- Concerns and ARC requests — owners pick the affected area from the same dropdown.
Setup
Edit the list from /dashboard/locations.php (board admin / property manager). For each location set a name, a short description, and optionally a photo. Locations show up in dropdowns across the dashboard immediately.
Use cases: a marina names every dock and slip; a condo names every floor, stairwell, and trash room; a campground names sites and shared cabins.
Newsletter signup — capture prospective owners from your public site
The public website that every SoShiny community gets at soshiny.com/{your-slug}/ can include a Newsletter Signup section — a small form where prospective owners, neighbors, and curious visitors leave their name and email. You build the list before they move in.
Turning it on
From /dashboard/settings.php → Landing tab, scroll to Newsletter signup and enable the section. Set the headline ("Stay in the loop") and supporting text. Save.
What the visitor sees
A simple two-field form (name + email) on the public landing page with a one-click signup and an immediate confirmation message. Honeypot + rate limiting prevents spam.
Where the captures land
Subscribers appear under /dashboard/subscribers.php (board admin) with name, email, signup date, and source page. Export to CSV for your mass-mail tool of choice, or hand the list to the marketing committee. Members can also one-click unsubscribe via a link in any broadcast — that's respected automatically.
Storage tracking — see exactly what's using your 1 GB allocation
Every SoShiny community starts with 1 GB of storage included — plenty for hundreds of documents, photos, and signed PDFs. The Storage Tracking page shows a drive-style breakdown of what's using that space.
Where to find it
/dashboard/storage.php (board admin). The page splits usage three ways: by file type (PDFs, JPGs, PNGs, etc.), by category (documents, media, signed PDFs, work-order photos, ARC attachments), and by user (whoever uploaded the file).
Cleanup actions
- Identify the 10 largest files in the system in one click.
- Archive or delete old documents from the same view.
- Spot photo galleries that have grown larger than they need to.
Going over 1 GB
Additional storage is available as a paid add-on. Storage Tracking shows projected usage growth so you can plan ahead rather than getting surprised.
Your own domain — run your community site on yourcondo.com
By default your community lives at soshiny.com/{your-slug}/. For $99/year you can serve it from a domain you own — yourcondo.com, bellaircondos.com, whatever. Members see the SoShiny portal under your domain; nothing else changes.
The setup
- Register the domain anywhere (GoDaddy, Hover, Squarespace, Hostinger — any registrar works).
- From
/dashboard/settings.php→ Custom Domain tab, paste the domain. Save. - Under the same tab, click Send DNS instructions — SoShiny will email a board-friendly walkthrough to whoever does your DNS (registrar-specific instructions for the most common registrars). The two records to add: A
@→ SoShiny's IP, Awww→ same IP. - Once DNS propagates (typically 15 minutes to 24 hours), the site serves under your domain with an auto-provisioned SSL certificate. No further action needed.
What stays the same
Members can still log in at the original soshiny.com/{your-slug}/ URL too — both addresses route to the same portal. The board-side and member-side experience is identical.
The branded login on your custom domain shows your association logo, hero image, and name above the sign-in card — automatically, no extra setup.
Full Association Website — your community's public-facing site
Every community on SoShiny gets a full public-facing website at soshiny.com/{your-slug}/ — no web developer required, no separate hosting, no maintenance. The site lives alongside your member portal and shares the same logo, hero image, and brand.
What can go on the public site
- Hero banner with your community name + tagline
- About your community (rich text, photos)
- Meet your board (board members opt in individually from their profile)
- Amenities, community photos, area attractions, plan-a-visit info, property listings
- Public documents (community-approved documents only)
- Upcoming events (only events with audience=all surface publicly)
- FAQ (the same one that's inside the portal)
- Announcements (only the ones marked public)
- Embedded map, social links, contact form, newsletter signup
Configuration
Every section is optional. Toggle each one on or off from /dashboard/settings.php → Landing tab. The public site renders only sections that have content + are enabled. Helper text reminds you which URL members will see ("…what residents see at soshiny.com/{your-slug}/ or your custom domain").
The whole thing is built mobile-first and ready to share with prospective owners, neighbors, contractors, or anyone else who wants to know who you are.
Community
Amenity Booking — reserve the clubhouse, pool deck, or any common space
Amenity Booking lets members reserve shared community spaces — clubhouse, pool deck, BBQ pavilion, conference room, or any common space the board has set up.
To make a booking: visit /dashboard/amenities.php, pick the amenity and date, then choose between Open to members (party with the building — neighbors will see it on the community calendar and can join) or Private event (the space is reserved but the occasion stays hidden). Either way, the booking shows on the community calendar as soon as it's approved (or immediately, if the amenity is set to auto-approve).
You'll see all of your bookings under My Bookings on the same page, with the status (pending, approved, denied) and an Open/Private badge.
For boards: the same page shows every booking in the community with one-click approve / deny / cancel. Approved bookings automatically create a calendar event so the rest of the community knows the space is reserved. Denials and cancellations cleanly remove the calendar entry. From the amenity edit form, set auto-approval per amenity, set a max attendee count, and set blackout dates.
Announcements
Announcements are how your board communicates with the community — meeting notices, maintenance alerts, social events, and more.
You can attach several photos to an announcement; they rotate on the post and on the lobby TV. Lobby TVs use a small JPEG so they do not freeze.
Reading announcements
The dashboard home shows the five most recent announcements. Click any one to open the full text. Go to Announcements in the sidebar to see everything, filtered by type or time period.
Announcement types
- General — routine community news
- Event — upcoming social events, board meetings
- Maintenance — scheduled work, outages, access restrictions
- Emergency — urgent notices that display as a red banner at the top of every page until they expire
- Beautification — landscaping, common-area improvements
- Birth notice / Death notice — community life events
Who sees what
Each announcement has an audience setting. All residents means everyone including renters. Owners only hides it from renters. Board only is internal.
Expiry
Announcements can have an expiry date. Once expired, they move to the archive. Board admins can view archived announcements from the Archived tab.
Events
The Events page lists community events — board meetings, social gatherings, pool parties, work parties, and anything else the board schedules.
Recurring events
A weekly board meeting or monthly social is stored once and expanded automatically. You will see every upcoming occurrence as a separate entry — not just one row with a recurrence note.
Print calendars
Use the Print buttons at the top of the Events page to get a clean, printable calendar for Today, This Week, or This Month. Useful for posting on a community bulletin board.
Public events
Events set to All residents (public) also appear on your community public landing page so guests and prospective residents can see what is going on. Events set to Members or Board only do not appear publicly.
Timezones
All event times display in your preferred timezone if you have set one in your profile, or in the association local timezone if you have not. Either way, no UTC conversion is needed on your part.
Lobby TV
Upcoming events also appear in the Events column on the Lobby TV display. Recurring series are fully expanded so every upcoming date shows up individually.
Marketplace — buy, sell, and give away
The community marketplace lets residents buy, sell, give away items, or post wanted ads — all within your community portal.
Posting a listing
Click + New listing on the Marketplace page. Pick a category (Furniture, Appliances, Free, Wanted, etc.), enter a price or mark it Free, write a description, and optionally add a photo. Your listing goes live immediately.
Managing your listings
You can edit your listing or mark it as Sold at any time from the Marketplace page. Sold listings disappear from the active view but stay in the history. You can also delete a listing entirely if the item is no longer available.
Contacting a seller
Each listing shows the poster name and contact information so interested neighbors can reach out directly. There is no in-app messaging — contact is handled outside the portal.
Lobby TV
Active listings also appear on the Lobby TV display in the Marketplace column, so neighbors browsing the lobby can see what is available. Photos are shown when present.
Moderation
Board admins can remove any listing. If you see something that should not be there, use the Feedback page to let the board know.
FAQ — community frequently asked questions
The FAQ page is a curated list of common questions and answers about your community — pool hours, guest policies, parking rules, move-in procedures, and anything else residents ask repeatedly.
Finding an answer
Use the search bar at the top of the FAQ page to search questions and answers by keyword. You can also browse all questions in order. Click any question to expand the answer.
Categories
FAQs are grouped into categories set by the board — for example Amenities, Parking, Move-in, Pets. Browse by category or search across all of them at once.
Not finding an answer?
If your question is not answered in the FAQ, use the Feedback page to send it to the board. If the board answers the same question from multiple residents, they will typically add it to the FAQ so everyone benefits.
Forms — guest registration, parking passes, and more
The Forms page gives residents a library of community forms to complete online — no printing or scanning required. Submitted forms are stored on your account and visible to board management.
Available form types
- Guest registration — register a guest or visitor in advance
- Temporary parking pass — request a short-term visitor parking pass
- Move-in / move-out notice — notify the building of a move date and elevator reservation
- Pet registration — register a pet per community rules
- Service animal notification — protected disclosure under Fair Housing rules
- Key / fob request — request a replacement or additional access credential
- Maintenance request — report something needing repair in your unit or common area
- Lease renewal notice — notify the board of a lease renewal
- Sublease notice — notify the board of an upcoming sublease
- Background check consent — consent to a background screening (if required by community rules)
- Variance / hardship request — request an exception to a community rule
- Committee interest — express interest in joining a committee
- Newsletter subscription — subscribe or unsubscribe to the community newsletter
- Other — general-purpose form for anything not covered above
Submitting a form
Click any form type, fill in the fields, and click Submit. You will see a confirmation message and the submission appears in your form history at the bottom of the Forms page. The board is notified of new submissions.
Viewing your past submissions
Your previous form submissions are listed on the Forms page under the form library. Click any entry to see what you submitted and any board notes added.
Property listings — for sale and for rent
The Listings page lets owners advertise units that are for sale or available for rent — directly within your community portal.
Posting a listing
Go to Listings in the sidebar and click + New listing. Fill in:
- Type — For Sale or For Rent
- Asking price or monthly rent
- Bedrooms, bathrooms, and square footage
- A description of the unit
- Contact name, email, and phone for inquiries
- An optional photo
Managing your listing
You can update the listing status at any time — Active, Pending, Sold, or Rented — directly from the status dropdown in the listings table without opening the full edit form. Use Edit to change any other detail or delete to remove the listing entirely.
Public visibility
Active listings automatically appear in the Properties Available section of your community public landing page. This is intentional — prospective buyers and renters often browse community pages before contacting a listing agent, and visibility there can accelerate the process.
Who can post
Owners and above can post listings by default. The board can adjust this minimum role in Settings → Permissions → Post property listings.
Area attractions
The Area Attractions page lets the board curate a directory of nearby places worth visiting — restaurants, shops, parks, gyms, and more. It appears on your public community landing page so guests and prospective residents can explore the neighborhood.
Adding an attraction
Go to Area Attractions in the sidebar and click + Add attraction. Fill in the name, category, a short description, address, optional website URL, and optionally a photo. Click Save and it goes live on the public landing immediately.
Categories
Dining, Shopping, Entertainment, Outdoor, Culture, Services, Other. The public page shows a tab for each category that has at least one active entry.
Distance display
If your association address is geocoded (set under Settings → Association profile), a distance badge appears automatically on each attraction card — for example "0.3 mi away." This uses the attraction address and your association coordinates.
Sort order and visibility
Each attraction has a sort order field. Lower numbers appear first. Use the Active toggle to temporarily hide an entry without deleting it.
Public dedicated page
The public landing page shows a preview of up to four attractions with a "See all" link. That link opens a dedicated /{slug}/attractions page with the full directory, category tabs, and distance info.
Surveys & polls
Surveys are quick community polls — a light way to ask members what they think, separate from formal Voting. Because they are not official ballots, they carry no quorum or record-keeping requirements.
Responding
Open Community → Surveys, click Respond on any open survey, choose your answer (or write one), and submit. You can respond once per survey. Depending on the survey, you may see the results right after you respond or once it closes.
Creating a survey (board)
Click New survey and set:
- Question type — pick one, pick several, or an open-ended written answer.
- Answer options — for choice polls (leave blank for written answers). You can also let members add a comment.
- Privacy — anonymous (don't show who answered) or named. The board always sees names.
- Results — whether members see results right after responding or only once the survey closes.
- Audience — all members, owners only, or renters only, plus an optional close date.
Publish right away or save a draft. Open, close, edit, or delete any survey from the list. (Answer options lock once members start responding so existing answers stay valid.)
Text alerts (SMS)
Communities can send text-message (SMS) alerts to members who have opted in — handy for urgent notices like water shut-offs, gate issues, or weather warnings.
Opting in (members)
Go to Settings → Your account → Text alerts and check the box. Make sure your mobile number is on your profile. Message & data rates may apply, and you can reply STOP to any text to opt out at any time (or START to opt back in).
Sending texts (board)
Open Operations → Text Members, choose an audience (all opted-in members, owners, renters, or board & staff), write a short message, and send. Your community name and the opt-out reminder are added automatically. Only members who opted in and have a valid mobile number receive the text.
Text messaging requires an active subscription (SMS has a small per-message cost) and is enabled once carrier registration (A2P 10DLC) is approved for your community.
Texting one member & smarter costs
Board admins and managers can text a single member from the 💬 Text button on their directory profile. The cost preview always shows the full math — segments × recipients × the per-segment price — before you send. A "primary owner per unit" audience is also available so co-owned units aren't double-texted.
Getting started
Load your roster (units, owners, renters)
Owners live in units. Load them together so you don’t put people in the units list, or units in the directory.
Two parts, in order
- Units and owners. One spreadsheet is best: unit number, owner name, email. Optional: type, phone. Two files is fine — units first, then owners. We read the headers and figure out what you uploaded.
- Renters. They come second. A renter attaches to a unit that is already on the list. You can skip this.
Go to Load your roster from Getting started, or open Load your roster.
Preview, then commit
Upload → map columns (we guess) → preview → Commit this load. Nothing is written until you commit. The preview shows counts, the first parsed rows, and plain-language warnings — units with no owner yet, emails already live on another community, units already on the list.
Undo
After a commit you can Undo this load from the success screen or from the wizard home. Undo removes only what that commit created: new units, new logins, new occupant links. Units and people who were already there stay. If undo is unsafe (a new unit now has a document, or a new login is also on another community), we say why and leave that row.
Same email, more than one community
If that email already has a SoShiny login somewhere else, we attach them. We do not create a second user. Same email, same password. After sign-in they pick which community to open if they belong to more than one.
The old CSV imports
Units → Import CSV and Directory → Import CSV are still there as a power-user back door. First time? Use Load your roster.
Governance
Resolutions register
The Resolutions page (Governance menu) is your association's resolution book: every formal resolution the board has voted on, across all meetings, in one searchable list.
Finding a resolution
Search by any word in the title or wording, narrow by date range, or filter by outcome (passed, failed, tabled, withdrawn). Each row links to the meeting where the vote happened and to the minutes of that meeting.
Printing
Print one resolution to get a formal document with the full wording, mover, seconder, individual votes, tally, and a certification block the secretary can sign. Banks and title companies often ask for a certified copy of a specific resolution, and this is exactly that. The Print button at the top of the register prints whatever your current search shows, as one document.
Resolutions and minutes
When you open a meeting's minutes, the resolutions adopted at that meeting appear below the minutes body. The print button offers the minutes alone or minutes plus resolutions as a combined package.
Do resolutions need signatures?
No. A resolution is valid when adopted by a quorum vote at a properly noticed meeting and recorded in the minutes, which the board approves at the next meeting. The certification signature is only for certified copies requested by outside parties.
Feedback, complaints, and compliments
The Feedback page lets you send concerns, complaints, compliments, or suggestions directly to the board. This is your primary channel for anything that needs board attention.
What to include
The more specific you are, the faster the board can act. The form lets you optionally:
- Tag a specific member or unit the concern is about
- Cite the community rule being violated
- Include a detailed description with dates and context
Your contact information
When you open the form, it shows your name, unit, email, and phone so you know exactly what the board will use to follow up. If your phone is not on file, there is a link to add it in your profile.
Anonymous submissions
You can check Submit anonymously to hide your identity from the board. Anonymous submissions are accepted, but the board cannot update you on the outcome or ask clarifying questions. For issues that need a resolution you can track, submitting with your name attached is strongly recommended.
Tracking your submission
After submitting, your concern appears in your Feedback page view with its current status — New, In Progress, Resolved, or Closed. You can see any board responses. The board may also add internal notes that are not shown to you.
Converting to a violation
Board admins can convert a concern to a formal violation record with one click. The violation form pre-fills from the concern text. You will not see this action but the board uses it to escalate rule violations through the formal notice workflow.
Access control
The board can configure who is allowed to submit concerns in Settings → Permissions → Submit concerns. By default all residents can submit, including renters.
Filing on behalf of a member (board and managers). When a complaint comes in by phone or at the front desk, use "Filing on behalf of a member" at the top of the new-concern form. The member becomes the submitter: the concern appears in their list, they get a confirmation email right away, and every board response after. Your name is recorded as the filer on the concern.
Architectural review requests (ARC)
Any modification to the exterior of your unit — paint color, satellite dish, deck addition, storm shutters, landscaping changes — typically requires approval from the Architectural Review Committee (ARC) before work begins. Check your community rules or bylaws for the specific list.
Filing a request
Go to Arch. review in the sidebar and click + New request. Fill in:
- Category — Paint, Addition, Landscaping, Roofing, Window, Door, Fence, Other
- Planned start and end dates for the work
- Contractor name and contact information, if applicable
- Estimated cost of the project
- A full description of the proposed changes
Submit the request and the board will review. You will receive an email notification when a decision is made.
Decisions and conditions
The board can approve, deny, or approve with conditions. All decisions include a written explanation. If approved with conditions, the conditions are listed in the decision record and you must comply with them to maintain approval.
Converting to a work order
If the approved modification also requires coordination of common-area work, the board can convert the ARC request to a Work Order to track that work separately.
Renters cannot file ARC requests
ARC requests are the unit owner responsibility. If you are a renter and need exterior modifications, the owner of your unit needs to file the request. Contact your owner or property manager.
Access control
The board can adjust who can file ARC requests in Settings → Permissions → Submit ARC requests.
Money & Dues
Vendor vetting
Vendor vetting
Every vendor has a vetting status: Pending review, Approved, or Suspended. New vendors start at Pending review. The checklist for approval lives on the vendor record (Bills → Vendors tab): a W-9 on file, current insurance, and a license number when the trade requires one. When the checklist is clear, a one-click Approve button appears on the vendor row.
Link a contractor's Certificate of Insurance to their vendor record on the Insurance page and the vendor's insurance-expiry date maintains itself from the certificate. The board digest warns when a vendor's insurance is 30, 14, 7, or 1 day from running out.
The bill screen shows a warning the moment you pick a vendor with a vetting gap, and recording or paying a bill for that vendor tells you exactly what is missing. These are warnings, never blocks: an emergency repair is always payable, and the warning becomes part of the record.
Operations
Collecting dues online (Member Dues + autopay)
Member Dues lets your homeowners association collect assessments online. Money goes straight to the association's own bank account. SoShiny never holds it.
Connect the payout account (board). Operations, then Member Dues, then Connect payout account. Stripe verifies the association and links your bank. This is a one-time setup by a board admin.
Bill dues. Generate a month's charges with one click, or turn on Automation and charges generate themselves on the day you pick. Per-unit amounts come from each unit's assessment fields.
Members pay. Each member sees their balance on My Dues and pays by bank transfer or card. Fees are itemized right on the payment: the association fee, the bank processing cost, and a small convenience fee. Card payments add a percent-based card fee instead. Your board can choose to absorb these fees so members pay exactly their dues.
Autopay. Members enroll once (bank or card, stored securely by Stripe) and each month's dues collect automatically, with a receipt every time. Failed payments retry on day 3 and day 7, then pause with the member and board both notified.
Where the money goes. Payouts land in the association's bank on Stripe's normal schedule. The whole board can watch balances, charges, and autopay enrollment on the Member Dues page.
Managing several communities (Portfolio)
If you manage more than one community on SoShiny (a community association manager, a maintenance company, or a shared bookkeeper), your communities can be linked to a single login.
Switching communities. A Community switcher appears at the top of your dashboard sidebar. Pick a community and your whole dashboard follows: directory, tasks, work orders, everything now shows that community.
The Portfolio page. The switcher's "Portfolio overview" link opens one screen with every community you manage, each with its open to-do tasks, active work orders, overdue items, and concerns awaiting a response. Click any count to jump straight to that list in that community.
Your role can differ per community. You might be a board admin in your home community and a property manager in another. Your permissions follow the role you hold in the community you are working in.
Getting communities linked. Community access is managed by SoShiny support — contact us and we will link the communities you manage to your login.
One My Work inbox. My Work merges everything assigned to you across every community you manage: open tasks, due maintenance, and active work orders, each labeled with its community. Click any item and SoShiny switches you into the right community and opens it. Maintenance items can be marked done right from the list, whichever community they belong to.
Getting assigned work anywhere. Boards in any community you manage can assign you to-do tasks, maintenance, and work orders — you appear in their assignee pickers under "Also manages this community."
Renter approvals (new tenant screening)
Renter approvals track a new tenant from application to a signed Certificate of Approval, in one place. Find it under Operations in the sidebar. The badge shows applications waiting on the board.
Start a file. Click "New application", enter the applicant, the unit, and the proposed lease term. The file opens in Under review.
Work the packet. The checklist mirrors the rental packet: application, guest policy and rules acknowledgements, background check consent and results, the lease copy, and both fees. The Service/ESA form can be marked N/A when it does not apply. The completeness meter shows what is still missing.
Record the interview. An interview with a board member or rental committee chair is required before approval. Check it off with the date and any notes.
Approve or deny. Approve is blocked until every required item and the interview are on file. Approval records the lease term on the unit automatically, so lease history and renewal reminders pick it up. A denial requires a written reason, and the reason must be a lawful, non-discriminatory basis under Fair Housing rules.
Issue the certificate. After approval, print the Certificate of Approval from the green banner, collect signatures, and file it to the unit through Documents.
Resources
Documents and files
The Documents page is where the board stores official files — bylaws, meeting minutes, insurance certificates, lease addenda, floor plans, and anything else the community needs on record.
Uploading documents
Click + Upload to add a file. You can select more than one file at once — each one is saved as its own document, sharing the title, category, and description you enter, with its own filename appended so they stay distinguishable in the list.
Accepted file types: PDF, Word (.doc/.docx), Excel (.xls/.xlsx), images (.png/.jpg), plain text, CSV, and ZIP — 25 MB per file.
Alert the board — two optional checkboxes on the upload form let you notify the rest of the board the moment a document goes up, by email and/or text, instead of waiting for them to notice on their own. This goes out immediately to board admins, board members, and the property manager (not the uploader). Texting only appears when the community has SMS turned on and at least one board member has opted in to texts.
Browsing and downloading
Documents are organized by category and access level. You can filter by category using the dropdown at the top of the list. Click the document title to view or download it. Your role determines which access levels are visible to you.
Access levels
- Public — visible to anyone on the community landing page, no login required
- Members — visible to all signed-in residents, both owners and renters
- Owners only — visible to owners and above; hidden from renters
- Board only — visible only to board members and management
- Unit only — visible to residents of a specific unit plus the board
Composed documents
Board admins can write a document directly in the portal using the built-in rich-text editor instead of uploading a file. Good for quick notices, policy clarifications, welcome letters, and announcements that do not need a PDF.
Document archiving
Documents can be archived (soft-deleted) instead of permanently removed. Archived documents disappear from the normal listing but can be restored by a board admin. Useful for superseded bylaws or old insurance certificates you want to keep on record.
E-signatures
PDF documents can be sent for e-signature. Board admins tag which members must sign, send a notification, and the signed copy is stored against the signer record. See the Document signing help topic for full details.
Versions
Each document has a version number. If a file is replaced, the version increments automatically and the history is preserved.
Rules, bylaws, and community policies
The Rules page gives every resident full-text access to the community rules and bylaws, with live search across all content.
Searching rules
Use the search bar at the top of the Rules page to search by keyword across all rule text, titles, and categories. Results highlight the matching terms. This is the fastest way to find the specific rule governing parking, pets, noise, or any other topic.
Categories and filtering
Rules are organized into categories — Parking, Noise, Pets, Common Areas, Guests, Maintenance, Modifications, etc. Use the category filter dropdown to narrow the list to a specific section of your community rules.
Inline images
Rules can include inline photos and diagrams — useful for illustrating parking layouts, pool signage, or approved exterior color palettes. These appear inline in the rule text when present.
PDF version
Your complete rules document may also be posted in the Documents section as a PDF. The Rules page and the PDF may differ if the board has made updates that have not yet been reflected in both places — always check with your board if there is a discrepancy.
Legal reference — Florida statutes
The Legal page gives every signed-in member access to Florida HOA and condo statutes — the actual laws that govern your community.
What is covered
- Chapter 718 — Florida Condominium Act (condominiums)
- Chapter 719 — Florida Cooperative Act (cooperatives)
- Chapter 720 — Florida Homeowners Association Act (HOAs)
- Chapter 553 — Building Construction Standards
232 Florida statutes are loaded in-app with full text for many sections. Use the search bar to find statutes by keyword, or filter by chapter, applies-to category, or topic category.
Reading statutes
Sections with full text loaded show an Expand button to read the complete language in-app. For the remaining sections, an Official site button links directly to the Florida Legislature website for that section number.
Important note
This tool is a reference resource, not legal advice. Laws change and interpretations vary by association type, governing documents, and specific facts. For anything consequential — fines, foreclosures, election disputes, variance requests — consult a licensed Florida HOA attorney before taking action.
Meeting minutes
The Minutes page gives residents read-only access to past board meeting minutes — the official record of what was discussed, voted on, and decided at each meeting.
What minutes contain
Each meeting record includes the date, type (Regular, Special, Annual, Emergency), location, attendees, agenda items with their outcomes, resolution votes with per-member Yes/No/Abstain tallies, and the final vote counts.
Access
The board controls who can read minutes in Settings → Permissions → Read meeting minutes. By default, all signed-in members can read minutes. If your board has restricted access, you may not see this page or may see only the list without full detail.
Printing
The board can produce print-ready minutes from the board meeting management page. If you need a printed copy for any reason, ask your board admin to provide one.
Florida law note
Florida Chapters 718 and 720 require boards to keep minutes of all meetings and make them available to unit owners. The specific access rules (time window, copy fees) differ by association type. Your board is responsible for compliance with the applicable chapter.
Media gallery — community photos
The Media page is the community photo gallery — board members upload photos of common areas, events, renovations, and anything else worth sharing.
Browsing photos
Photos are organized by category and displayed in a grid. Click any photo to view it full-size. Use the category filter to narrow to a specific type — Common Areas, Events, Renovation, etc.
Visibility
Photos have a visibility setting:
- Public — appears on the community public landing page, no login required
- Private — signed-in members only; does not appear on the public page
Captions
Each photo can have a caption. Captions appear in the gallery grid and on the full-size view.
Who can upload
Board members and management can upload photos. Residents can view them.
Member directory
The Directory lists your community members — name, unit, role, contact information, and headshot when available. Access is role-based and privacy-respecting.
What you can see
By default, all signed-in residents can see the basic directory. The board controls whether full contact details (email, phone) are visible to residents vs. board-only. Check with your board if you cannot see contact information you expect.
Privacy opt-out
Members who have opted out of the directory in their Settings are not shown in your view. They still exist in the system and can use all features normally.
Filtering and search
Use the search bar at the top of the Directory page to search by name, unit number, or email. Filter by role (owners, renters, board, staff) using the role dropdown.
Unit view
Click a unit number in the directory to see all residents associated with that unit — useful for understanding who lives where in a building with shared units.
Board contacts
Board members who have opted in to show on the public landing page will also appear in the Meet Your Board section of the community public site, visible to anyone.
Contacts page
The Contacts page (separate from the Directory) lists management contacts — property managers, building superintendent, emergency contacts, vendor contacts. This page is configured by the board and is read-only for residents.
Owners, renters & staff
The directory lists owners, renters, and staff. A person’s ownership and their role are tracked separately, so someone can be both — for example an owner who also works for the association.
When someone leaves
Boards record a departure with a reason — moved out, sold, transferred ownership, or passed away — and the real date, even backdated. Marking a passing stops all communications to that person immediately, records the family or estate contact, and flags the unit "Estate of…" until ownership is resolved. Past departures can be fixed or undone from the unit's history table.
Export to CSV
Board and management can export the directory's current filtered view — search, role, owners-only, and contact-gap filters all respected — as a spreadsheet via the ⬇ Export CSV button in the filter toolbar.
Contacts — management and vendor directory
The Contacts page lists key management and vendor contacts for the community — property management company, building superintendent, maintenance contractor, emergency services, and anything else the board wants residents to have quick access to.
Who maintains this list
Board admins add and update contacts. If a number is wrong or a contact is missing, let your board admin know via the Feedback page.
Access control
The board can control who can see the Contacts page in Settings → Permissions → Read contacts. By default it is visible to all signed-in members.
Emergency contacts
If your board has added an emergency contact (police non-emergency, fire department, building super after hours, etc.), they appear at the top of the Contacts list. Save these to your phone as a backup.
In-app help — how to find answers without emailing the board
SoShiny ships with a full help library covering every feature in the portal. The library is role-aware — you only see topics relevant to your role (renter, owner, board member, board admin, manager, staff).
Two ways to find a topic
- Help page at
/dashboard/help.php— browse every topic grouped by category, or use the search box at the top to filter by keyword. - Global search in the top nav — the same search bar that finds rules, documents, members, and events also surfaces relevant help topics. If you type "how do I book the clubhouse" the Amenity Booking help topic shows up.
What's in a topic
Each topic has a written walkthrough, an optional embedded video, and screenshots when they help. Topics are kept short and practical — "here's how to do X" rather than long manuals.
Boards: add or edit topics from /admin/help.php (super-admin). Rich-text editor with image upload + YouTube embedding.
Global search — one search bar finds everything
The search bar at the top of every dashboard page searches across the entire portal. One query, results grouped by source.
What it searches
- Rules & bylaws — full text, with the exact citation surfaced
- Documents — titles, descriptions, and tags
- Members — by name, unit, role, or contact info (respecting privacy settings)
- Events — title, location, description
- Meeting minutes — full text
- FAQs — questions + answers
- Work orders (board view) — title, location, status
- Help topics — every page in this help library
Results are grouped by source and respect your role — owners don't see board-only work orders in their results, renters don't see owner-only ARC details.
Quick tip
Try natural-language queries like "how do I report a leaky faucet" or "fence height rule" — the search index understands intent, not just keywords.
Settings & administration
API access
The API lets you connect your association to other software: a spreadsheet that pulls the member list, a script that files work orders, or an automation tool.
Creating a token
Go to Settings → API access. Give the token a name describing what it is for, tick only the permissions the tool genuinely needs, and optionally set an expiry date. The token is shown once when you create it. We store only a one-way hash, so if you lose it you will need to create a new one.
Treat a token like a password
Anyone holding it can do everything you ticked, without signing in. Do not email it or paste it into a shared document. If you think one has been exposed, revoke it: anything using it stops working straight away, and you can issue a replacement in seconds.
What it can and cannot reach
A token only ever sees your own association. It can read and write members, units, work orders, announcements and events, and read document details. It cannot download document files, and it cannot write to the accounting ledger, because every financial posting has to pass the balance and period-lock checks built into the books.
Full technical documentation is at soshiny.com/api-docs.
Webhooks: telling other systems what happened
A token lets another program ask us for information. A webhook is the other direction: we tell it the moment something happens, so nothing has to sit there polling.
On the same page, add the web address the other system gave you, tick the events you care about, and copy the signing secret. That secret is how the receiving end confirms the message genuinely came from your association rather than from someone who guessed the address, so whoever set up the receiving system needs it. Like a token, it is shown once.
Use Send test before you rely on it. The test arrives within a few minutes and shows up under Recent deliveries with whatever the other system answered.
If an address stops responding we keep retrying with longer and longer gaps. After repeated failures we switch that endpoint off and mark it on the page, rather than sending to a dead address forever. Fix the receiving end, then use Switch back on.
Your account
Getting started
Welcome to SoShiny — a community portal built for boards and residents who want transparency without the runaround. Here is what you can do from the moment you sign in.
Your dashboard home
The home page shows a live count of everything in your community — members, units, announcements, events, documents, and more. Each tile is a link that takes you straight to that section.
The sidebar
Everything is organized into collapsible groups on the left sidebar. What you see depends on your role:
- Community — announcements, email broadcasts, events, FAQ, marketplace, property listings, area attractions
- Resources — documents, forms, rules & bylaws, legal reference, meeting minutes, media gallery, member directory, contacts
- Governance — committees, feedback & concerns, architectural review, violations, work orders, board voting, board meetings
- Operations — units, parking, employees, insurance (board and management only)
- Configuration — activity log, settings (board and management only)
Items you do not have permission to access are hidden automatically — your sidebar only shows what you can use. Click any group header to collapse or expand it. The sidebar collapses to icon-only mode using the toggle button on the left edge of the screen. On a phone, scroll the open menu to reach items at the bottom.
Your profile
Click your name or initials in the top-right corner to reach your profile page. From there you can upload a headshot, write a short bio, set your preferred timezone, and manage your saved e-signature images.
Getting help
This Help section covers every feature in the portal. Use the search box in the left sidebar to find a topic, or browse by category. If something is missing or wrong, let your board know via the Feedback page.
Directory privacy — hiding yourself from other residents
Owners and renters can hide themselves from the resident directory without involving the board.
How to opt out
Go to Settings → Your account and check "Hide me from the resident directory." Save. That is it. Other residents will no longer see your name, unit, email, or phone in the directory listing.
What still works when you are hidden
You can still log in, submit forms, post to the marketplace, attend events, and use everything else normally. Hiding yourself only removes you from the directory view that other residents see.
Who can still see you
The board and management can always see every resident regardless of the privacy setting. They need your contact information to manage the community — dues, work orders, violation notices, and anything that requires reaching you directly.
Board members cannot opt out
Board members and admins do not have the opt-out toggle. Their presence in the directory is part of the role — residents have a right to know who is managing their community.
The board can also deactivate accounts
A board admin can mark an account as inactive from the directory edit screen, which hides the member more completely. Your privacy toggle is the self-serve version that does not require any board action.
Changing your password
While signed in
Go to Settings → Your account and use the Change password card. You will need your current password. The new password must be at least 8 characters. After saving, any outstanding password-reset tokens for your account are invalidated automatically.
If you are locked out
Use Forgot password on the login page. Enter your email address and a reset link will be sent to you. The link expires after 1 hour and can only be used once. Requesting a new link cancels any previously sent link.
If the reset email does not arrive
Check your spam or junk folder first. If it is not there, contact your board admin — they can send you a password reset link directly from the directory, or resend your original invitation email.
Rate limiting
For security, no more than 5 password-reset requests per IP address are allowed per hour. If you hit that limit, wait 60 minutes and try again or contact your board admin.
Your profile — headshot, bio, and saved signatures
Your profile stores your headshot, bio, timezone preference, and saved e-signature images. Access it by clicking your name in the top-right corner of any page.
Headshot
Upload a square photo — JPG, PNG, WEBP, or GIF, max 8 MB. Your headshot appears in the member directory (if you are not hidden), on the public community landing page in the Meet Your Board section (board members who opt in), and in board meeting minutes.
Bio
A short text bio displayed in the directory and on the public landing page. Keep it brief — a sentence or two is enough. Board members often use this for their title or committee role.
Timezone
Set your preferred timezone and all timestamps in the portal — events, meeting times, announcements — will display in your local time instead of UTC.
Saved e-signatures
You can draw and save one or more signature images on your profile. When you sign a document, your saved signature is used automatically — no re-drawing required. You can save multiple signatures and choose which one to use at signing time. To add a signature, click Add signature on the profile page and use the drawing pad.
Show on public landing page
Board members have an additional toggle: Show me in the Meet Your Board section on the public landing page. When enabled, your name, headshot, and bio appear publicly without requiring a login. This is opt-in only.
Appearance — light/dark mode & color themes
You can personalize how your portal looks. Tap the Appearance icon (the gear/sun) in the top bar — on a computer it’s in the top-right corner; on a phone it’s in the top bar next to the bell.
Light or dark mode
Choose Light or Dark to match your preference or your surroundings.
Color themes
Pick from eight color themes — Sunset, Slate, Marina, Garden, Forest, Plum, Crimson, and Emerald — to give your portal a look you like.
Your choice is saved to your account and follows you across your devices.
Appearance: dark mode & color themes
You can tailor how SoShiny looks on your device. Open the Appearance menu — the sun icon in the top bar, or the Appearance section at the bottom of any public page.
Light or Dark
Switch between a bright Light look and an easy-on-the-eyes Dark look.
Color theme
Choose a color theme tuned to your kind of community:
- Sunset — condos & co-ops (the classic SoShiny look)
- Slate — HOAs & master-planned communities
- Marina — marinas & waterfront
- Garden — mobile-home & 55+ communities
- Forest — campgrounds & RV parks
Your choice is remembered in this browser and only changes what you see.
Finish setup — new resident checklist
New to your community portal? The Finish setup checklist walks you through the essentials in a couple of minutes. When your profile isn’t complete, your dashboard shows a Profile completion bar under the greeting — tap Finish setup → to open the checklist.
What it covers
- Confirm what’s on file — your mailing address, cell phone, email, and unit info (one tap if they’re right, Change if not).
- Allow text messages — opt in to urgent community alerts.
- Build out your profile — a photo of yourself, your vehicle, guests, a service animal, an additional phone, and an emergency contact.
Good to know
- Skipping counts. “I don’t have a vehicle” is a complete answer — skipped items count toward 100%, and you can undo a skip any time.
- It completes itself. Do the real thing anywhere in the portal (add a photo on My Profile, register a vehicle from the dashboard) and the checklist marks it done automatically.
- At 100% the bar disappears from your dashboard.
Popups, celebrations, and the board
Every checklist item now opens a simple popup — nothing takes you away from the page, including allowing text alerts. Finishing or skipping an item earns a small celebration, and reaching 100% opens a congratulations window with the welcome video. Board members and property managers see the checklist too.
My Profile & dashboard quick actions
My Profile is your one place for everything about you — name, contact details, mailing address, headshot, and bio, plus your timezone, text-alert opt-in, directory privacy, and password (all of which used to live under Settings). Board members and managers use Settings only for community configuration.
Quick actions on your dashboard
Your unit card on the dashboard has three quick actions, each opening a simple pop-up:
- 🚗 Register a vehicle — add your car to the community registry (plate, make, model, color) so management can match cars to units for parking.
- 🧳 Register a guest — let management and security know about a guest staying at your unit, with their dates and vehicle.
- ✈️ I’ll be away — tell management you’ll be traveling (for emergency prep and authorized access). While you’re away the button becomes 🏠 I’ve returned — one tap marks you home.
At a glance
- Your unit shows an “away” ribbon while you’re traveling and a “guests staying with you” ribbon when a guest’s visit covers today.
- My Profile shows your current away / returned status and lists everyone you have visiting, where you can cancel a registration.
Travel details and guest registrations are private to management and the board — they never appear on the Lobby TV, public page, directory, or any broadcast.
Email preferences — unsubscribing
Your community sends two kinds of email: required notices (dues, legal notices, emergency alerts, meeting notices) and optional broadcasts (events, amenity updates, newsletters).
You can unsubscribe from optional emails using the link at the bottom of any broadcast. You’ll see a confirmation page explaining exactly what you’ll miss versus what you’ll still receive. You will always receive required notices. Changed your mind? Ask your board to switch optional emails back on.